Captive Portal: Difference between revisions
Bcarmichael (talk | contribs) |
|||
| Line 130: | Line 130: | ||
* '''Redirect URL''': Users will be rerouted to this site after successful authentication. If '''Redirect URL''' is blank they will be sent to the original destination. | * '''Redirect URL''': Users will be rerouted to this site after successful authentication. If '''Redirect URL''' is blank they will be sent to the original destination. | ||
:Make sure to enter a complete url (e.g. <nowiki>http:// | :Make sure to enter a complete url (e.g. <nowiki>http://edge.arista.com</nowiki>) or this setting will not properly operate. | ||
=== Custom Pages === | === Custom Pages === | ||
Revision as of 18:11, 2 November 2022
 Captive Portal Captive Portal
|
|
About Captive Portal
Captive Portal allows administrators to require network users to log in or accept a network usage policy before accessing the internet. Captive Portal can authenticate users against NG Firewall's built-in Local Directory, Active Directory (if Directory Connector is installed), or RADIUS. It can be used to set up policies (for Policy Manager) by username (or group name if using Active Directory) rather than IP. While Captive Portal is running, captured machines will be forced to authenticate (or just press OK) on the Captive Portal page before they are able to access the internet.
Captive Portal is a common technique used to identify users on the network as describe in User Management.
Getting Started with Captive Portal
After installing Captive Portal, complete the following steps to get it working:
- Define which machines will be captured and required to complete the Captive Portal process before accessing the Internet - enabling the first example rule in the Capture Rules table will force all machines on the internal interface to use Captive Portal.
- Enter any IPs that unauthenticated machines will need to access - these can be entered in the Pass Listed Server Addresses section of the Passed Hosts tab.
- Enter any IPs that always need access to the internet - these can be entered in the Pass Listed Client Addresses section of the Passed Hosts tab.
- Customize the Captive Portal page on the Captive Page tab. If Basic Login is chosen, set the appropriate authentication method for users on the User Authentication tab.
- Turn on Captive Portal.
At this point Captive Portal will evaluate your Capture Rules and any traffic that matches will be stopped until that user has completed the Captive Portal process.
Settings
This section reviews the different settings and configuration options available for Captive Portal.
Status
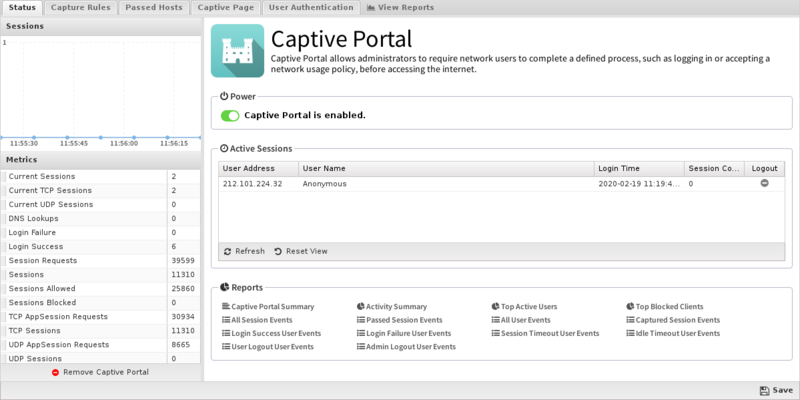
This tab shows the current status of Captive Portal. You can see information about current captured IPs, such as the username and other session information. You can also logout any active session.
Capture Rules
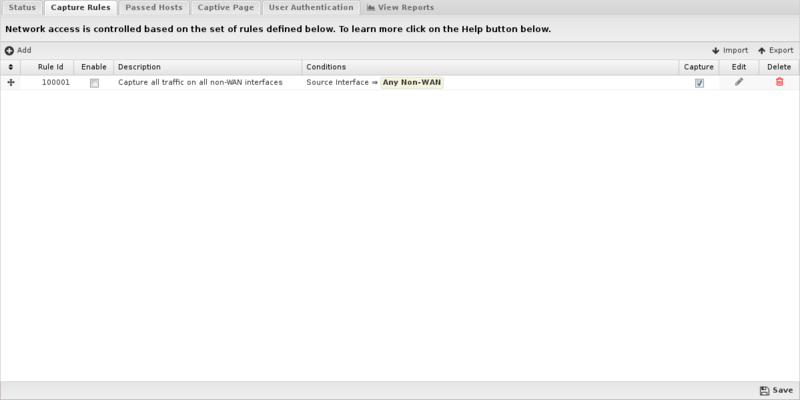
The Capture Rules tab allows you to specify rules to Capture or Pass traffic that crosses the NG Firewall.
The Rules documentation describes how rules work and how they are configured. Captive Portal uses rules to determine whether to capture or pass each network session. The rules are evaluated in order, and on the first match, the configured action will be applied. If no rules match, the traffic is allowed by default.
If the action is Pass the session is passed, regardless of the clients authentication status. If the action is Capture the session is "captured" which means several different things depending on several factors:
- If the client is authenticated, the session is passed
- If the client is not authenticated and the protocol is tcp and the destination port = 80, then a redirect to the captive portal page is sent.
- If the client is not authenticated and the protocol is tcp and the destination port = 443, then a redirect to the captive portal page is sent. (The certificate will not match as the captive portal is not actually the requested server)
- If the client is not authenticated and the destination port = 53, then a DNS response is sent after validating it is a valid DNS request.
- If the client is not authenticated and the session has a destination port != 53,80,443 then then session is blocked.
Passed Hosts
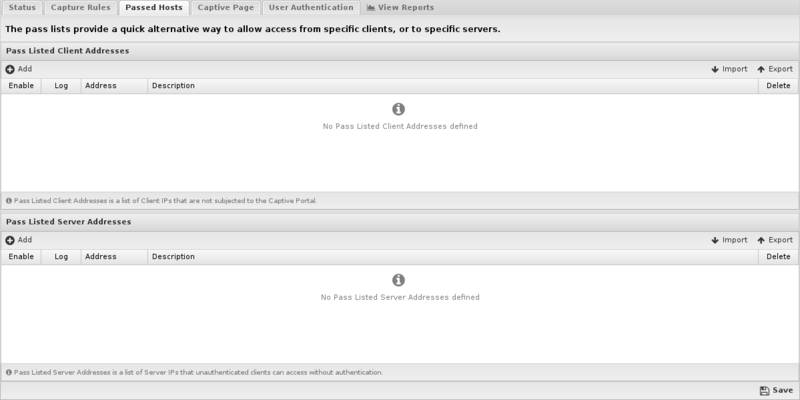
The Pass Hosts tab allows you to specify machines that either a) should not be affected by Captive Portal, or b) servers that machines behind Captive Portal should be able to access even if unauthenticated.
- Pass Listed Client Addresses: These machines will not be affected by Captive Portal. This is useful for servers and devices without browsers.
- Pass Listed Server Addresses: Machines behind Captive Portal will be able to access these servers whether or not they have authenticated through Captive Portal. Typically these will be any DNS or DHCP servers that are separated from their clients by NG Firewall. If NG Firewall is handling DHCP or DNS, this is not necessary.
Captive Page
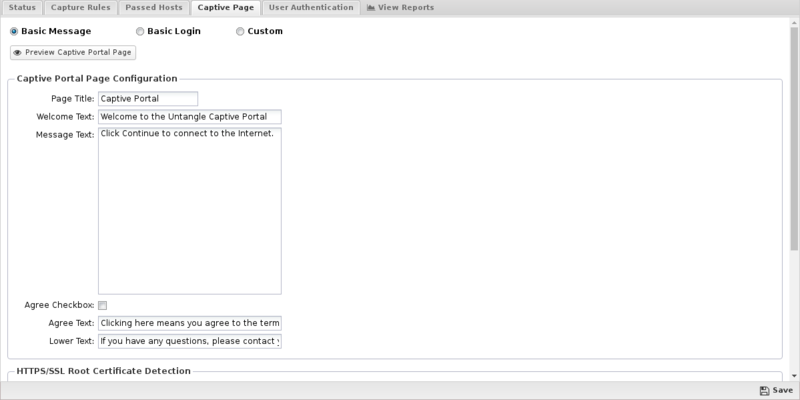
This tab controls the type of Captive Portal page displayed to unauthenticated users. Please note that you can use HTML in the Captive Portal page fields, however invalid HTML will prevent the page from properly rendering.
- Basic Message: Select this option if users should see (or accept) a message before being allowed to the internet. It has several tunable properties such as Page Title, Welcome Text, Message Text and Lower Text. If Agree Checkbox is enabled, users must check a checkbox (labeled with the Agree Text) before continuing.
- Basic Login: Select this option if users should see a page that requires them to login. Similar to Basic Message, it has several properties that can be configured. When the login/continue button on the page is clicked the user will be authenticated. You'll also need to set your authentication method on the User Authentication tab.
- Custom: Select this option if you would like to upload a custom Captive Portal page. This is for experienced web developers that are comfortable with HTML, Python and JavaScript - the Edge Threat Management Support department can not help with development of custom Captive Portal pages. If Custom is selected it is advised to turn off automatic upgrades - newer versions of NG Firewall may be incompatible with any custom captive page.
NOTE: When using 'Any OAuth provider' for User Authentication, you should select 'Basic Message'. All of the 'Page Configuration' options except for the agree checkbox and text will be used when generating the OAuth provider selection page.
HTTPS/Root Certificate Detection
This feature checks if the root certificate is installed on the client machine. If the root certificate is not installed, you have the option to display a warning or block the connection. The root certificate used by HTTPS Inspector and other HTTPS connections to the unit including Captive Portal. This feature is highly recommended if you have HTTPS installed. The server certificate must have all the names and IP address used on the NG Firewall.
- Disable Certificate Detection: No checking for the root certificate.
- Check Certificate. Show warning when not detected: Checks the root certificate. If not found, displays a warning with instructions to install the certificate.
- Require Certificate. Prohibit login when not detected: Checks the root certificate. If the root certificate is not found, the connection is blocked and the client is given instructions to install the certificate.
The Preview Captive Portal Page button can be used to view what the configured captive page looks like. This button only works when Captive Portal in on.
Session Redirect
- Block instead of capture and redirect unauthenticated HTTPS connections: The browser redirecting from a HTTPS URL to the captive page will show certificate error as the captive page is not the page requested. To avoid this error message, block the traffic and show nothing instead of showing the captive login page.
- Use hostname instead of IP address for the capture page redirect: Create the browser redirect using the hostname instead of the IP address of the server.
- WARNING: If enabled, the admin must ensure that the hostname properly resolves to the internal IP of NG Firewall on all internal networks. If internal hosts use NG Firewall for DNS, this is automatic. If using another internal DNS server it is the administrator's responsibility to configure DNS to properly resolve to the correct internal IP on all internal networks. If this is not configured properly Captive Portal will not function properly as clients will not be able to reach the captive portal page. Host will NOT be able to reach the captive portal page if the hostname resolves to the external IP of NG Firewall.
- This option is useful for organizations that have valid certificates on the NG Firewall server and wish to avoid the cert warning on the capture page. NOTE: This has nothing to do with the first warning caused by serving/spoofing the 301 redirect from a internet site to the capture page.
- Always use HTTPS for the capture page redirect: Always redirect to the HTTPS version of the login page when using Captive Portal.
- Redirect URL: Users will be rerouted to this site after successful authentication. If Redirect URL is blank they will be sent to the original destination.
- Make sure to enter a complete url (e.g. http://edge.arista.com) or this setting will not properly operate.
Custom Pages
There are two levels for customizing the Captive Portal capture page. One is fairly easy and the other is more complex.
For the easy method, you create a custom.html file and place it along with any supporting image files, etc. into a zip file, and then upload the file via the administrative interface. This allows you to customize the look and layout of the page while leveraging the existing code and application settings. To use this model, you need to be familiar with HTML and forms. We have created two examples that each include a simple and well documented custom.html file to help you get started.
| Description | Download | Screenshot |
|---|---|---|
| Custom login text | custom_login.zip | |
| Custom agree text | custom_agree.zip |  |
The more difficult method also gives you the most flexibility, as your custom zip will include a custom.py Python script. This gives you the ability to perform any kind of authentication or validation you wish. To use this model, you should be fluent in Python programming, and experience with mod_python will also be helpful.
User Authentication
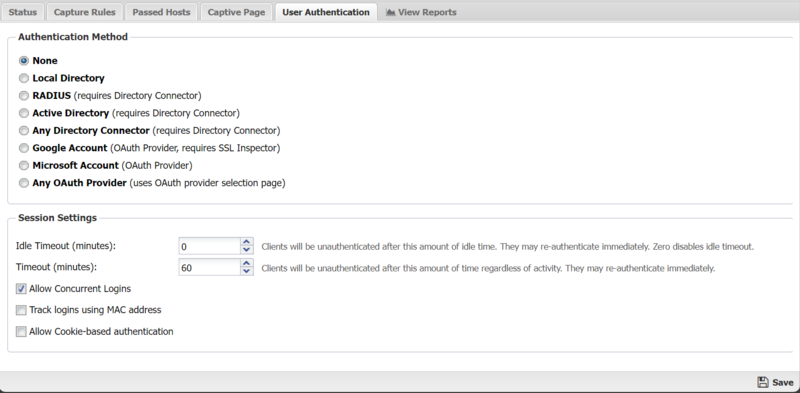
This section controls how users will be authenticated if the Basic Login page is used.
- None: is used in the case where no login is required.
- Local Directory: Use the NG Firewall's built-in Local Directory (Config > Local Directory) to authenticate users.
- RADIUS: Use an external RADIUS server to authenticate users. This option requires Directory Connector to be installed and enabled and configured.
- Active Directory: can be used if user should be authenticated against an Active Directory server. This option requires Directory Connector to be installed and enabled and configured.
- Any Directory Connector: can be used to allow users to authenticate against any of the configured and enabled Directory Connector methods. This option requires Directory Connector to be installed and enabled and configured.
- Google Account: can be used to allow users to authenticate via OAuth using a Google account.
- Facebook Account: can be used to allow users to authenticate via OAuth using a Facebook account.
- Microsoft Account: can be used to allow users to authenticate via OAuth using a Microsoft account.
- Any OAuth Provider: can be used to allow users to select and authenticate using any of the supported OAuth providers. When this option is selected, unauthenticated users will first encounter the OAuth selection page where they will click the icon or link corresponding to the provider account they wish to use.
The Session Settings section controls the timeout and concurrent login settings for Captive Portal.
- Idle Timeout: This option controls the amount of time before a host is automatically logged out if no traffic is seen. While a machine may be idle, it is still active on the network level. In this case Idle means no new TCP or UDP connections are seen by the Captive Portal. IMPORTANT: It is recommended to leave this at zero (not enabled).
- Timeout: This option controls the amount of time before a computer will be automatically logged out. After this the user must log in again through Captive Portal. Timeouts greater than 1440 minutes (1 day) is not recommended. The authenticated table is store in memory and will be flushed on reboot/upgrade. Additionally, the logout time should also be shorter than your DHCP lease time to assure IPs don't change before the Captive Portal timeout.
- Allow Concurrent Logins: This option controls if multiple machines can use the same login credentials simultaneously. If enabled, two or more users can login with the same username/password at the same time.
- Allow Cookie-based authentication: When enabled, a cookie is added to the users browser and used to authenticate the user in future sessions. Cookies must be allowed by the browser and not cleared when closing the browser or by other security programs. When the Cookie timeout is reached the user is forced to re-authenticate (regardless of activity). The default is 24 hours.
- Track logins using MAC address: When enabled, Captive Portal will use the MAC address instead of IP address to identify the client machine. If the MAC address for a given IP address is not known it will revert to using an IP address. This option is useful on smaller flat networks where NG Firewall is on the same network segment as all the hosts, and you have a very long timeout period such that a client's IP address might change.
Reports
The Reports tab provides a view of all reports and events for all traffic handled by Captive Portal.
Reports
This applications reports can be accessed via the Reports tab at the top or the Reports tab within the settings. All pre-defined reports will be listed along with any custom reports that have been created.
Reports can be searched and further defined using the time selectors and the Conditions window at the bottom of the page. The data used in the report can be obtained on the Current Data window on the right.
Pre-defined report queries: {{#section:All_Reports|'Captive Portal'}}
The tables queried to render these reports:
Related Topics
Captive Portal FAQs
Machines behind the Captive Portal page are not working - how can I troubleshoot?
The Block Event Log shows all traffic that is being blocked because the source machine has not been authenticated. This is useful for finding out what traffic is being blocked and if there is any that should not be blocked. Often idle machines without logged in users can still be active on the network, making this log quite large. If there is activity that shouldn't be blocked under any circumstances this can be fixed by modifying the Capture Rules, the client and server pass lists, or creating bypass rules if Capture Bypass Traffic is unchecked.
Getting "Error: Missing Identity" error on Captive Portal Login when using Google OAuth
Google OAuth rejects the user agent from the captive portal login helpers on both Apple and Android/Chromebook devices. The solution is to ignore the helper, and only attempt to login by opening a browser window and authenticating on the login page that comes up when captive portal does the capture and redirect.

