Intrusion Prevention
 Intrusion Prevention Intrusion Prevention
|
|
About Intrusion Prevention
Intrusion Prevention is an Intrusion Detection system that detects malicious activity on your network.
To detect malicious activity, Intrusion Prevention uses signatures, a method that draws upon a database of known attack patterns. If a network session matches a signature, its enabled action directs Intrusion Prevention to Log (records the incident but does not stop the activity) or Block (records the incident and does stop the activity).
There is tremendous diversity between networks and it is possible for a signature to correctly identify malicious activity on one network and incorrectly match legitimate traffic on another. Logging all matching signatures can make it difficult to effectively monitor Intrusion Prevention and blocking can disrupt legitimate traffic causing cause your network to appear to be broken. Therefore it is perfectly legitimate for there to be many signatures set as disabled or not active in Intrusion Prevention. In fact, it is advised that you use to the Recommended actions as specified by the signature database providers.
The database contains over 26,000 signatures making it difficult to manage signatures directly. Rules are used to configure groups of signatures on matching various attributes. A condition can match an attribute such as classtype. For all signatures that match, they are configured in Intrusion Prevention according to the rule action. Any signature not matched by a rule is Disabled. A default set of rules based on system memory are enabled by default.
The signature database is automatically updated several times a week. New and updated rules will be configured as determined by rules.
All detected activity for enabled signatures is recorded to the Intrusion Prevention All Events log. You should review this log on a daily basis.
Note: Intrusion Prevention installs but is off by default.
Note: Intrusion Prevention can be memory intensive and requires at least 2GB of RAM. The amount used is a combination of the number of enabled signatures and the amount of traffic that goes through your system.
Settings
When To Scan
Intrusion Prevention can be run before or after other network processing. Which option depends largely on your reasons for using Intrusion Prevention.
When Before other Network Processing is selected (the default), IPS sees all traffic even if it will subsequently be dropped by the firewall. This means IPS will see much malicious activity like port scan, intrusion attempts on the public IP addresses that happen on almost all networks, even though that traffic will ultimately just be dropped. The advantage of this approach is that Intrusion Prevention sees and logs everything providing the most complete picture. The disadvantage is that it usually logs so much that the Intrusion Prevention event log quickly become ignored because its logging thousands of events per day and this is completely normal and expected.
When After other Network Processing is selected IPS will only scan traffic that will actually pass through the firewall. Most networks where Untangle is running with a Public IP and doing NAT and only port forwarding select or no traffic at all, this will be extremely different that scanning "prerouting". The advantage of this mode is that IPS will only scan/log on traffic that is actually entering your network and therefore ignores a lot of the standard "noise" from incoming port scans and vulnerability scans that just get dropped at the firewall and logs only on traffic that should potentially concern the administrator. Another advantage is that it fully allows bypass traffic to work as expected. The disadvantage of this mode is that it provides a less complete picture of activity on the public interface it now no longer logs attempts that just get dropped.
Status
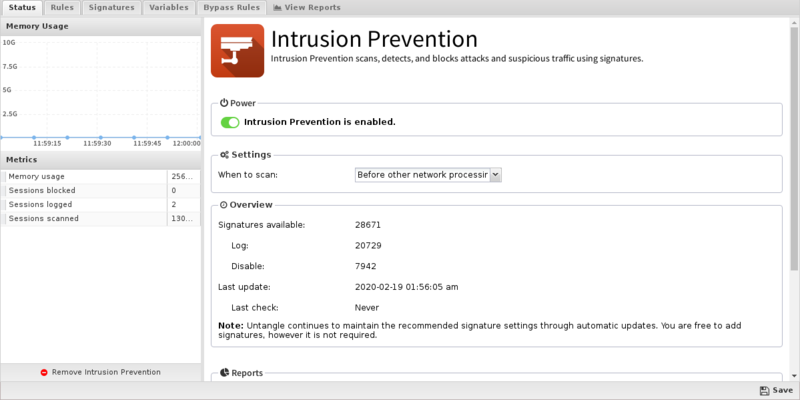
The Status tab shows the following information:
- Memory Usage. The amount of system memory the IPS engine is using compared to your installed system memory.
- Metrics. The number of blocked, logged, and scanned sessions.
- Overview. Signatures and Signature Updates.
- Signatures. Total number of signatures available and the number set for Log, Block, Disabled.
- Updates. The last time the signature database was updated and the last time a check was performed. Database updates do not occur on each check.
Rules
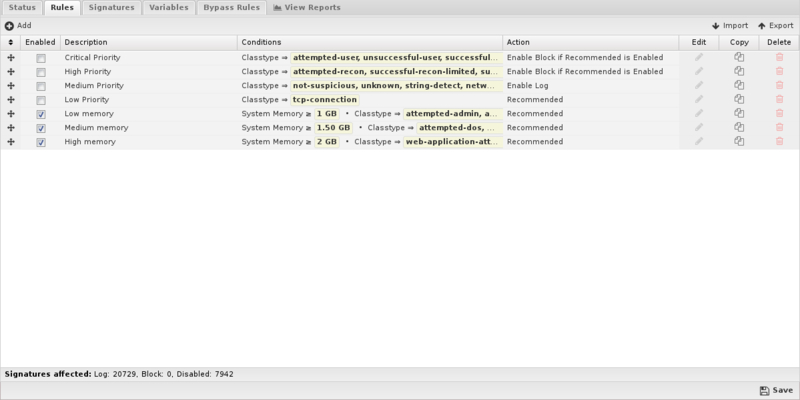
Rules allow you to control which signatures are enabled (and their actions) or disabled. For each signature the rules are evaluated in order, the action from the first matching rule is used to determine the status of that signature. The Intrusion Prevention rules are the mechanism to determine which signatures are enabled and their associated actions. These rules have no impact on network traffic and are not evaluated against packets, sessions, or network traffic in any manner.
Any signature not matched by any rule is disabled.
The Rules documentation describes how rules generally work and how they are configured. The major difference for Intrusion Prevention is the Conditions List.
At the bottom of the tab a stats bar indicates how many signatures are affected by the currently defined rules.
When adding or editing a rule, the bottom of the edit window will show how many signatures are affected by the conditions as you build the rule.
Rule Conditions
Conditions define which signatures will match the rule. If and only if all of the conditions match, the rule is considered a match.
The following conditions are specific to Intrusion Prevention rules:
| Name | Syntax | Function |
|---|---|---|
| Signature identifier | Numeric | Matches if value matches the exact or partial signature identifier. |
| Group identifier | Numeric | Matches if value matches the exact or partial group identifier. |
| Category | Checkbox | Matches if value is in one of the checked categories. |
| Classtype | Checkbox | Matches if value is in one of the checked classtypes. |
| Message | Text | Matches if value matches the exact or partial signature subject message. |
| Protocol | Checkbox | Matches if value is in one of the checked protocols. |
| Source Address | Text | Matches if value matches the exact or partial source address. |
| Source Port | Text | Matches if value matches the exact or partial source port. |
| Destination Address | Text | Matches if value matches the exact or partial destination address. |
| Destination Port | Text | Matches if value matches the exact or partial destination port. |
| Signature | Text | Matches if value matches the exact or any part of the entire signature. |
| Custom | Boolean | Matches if value is a custom signature. |
| Recommended Action | Select | Matches if value is a signature's recommended action. |
| System Memory | Numeric | Matches if system memory matches this value. |
Rule Actions
When all conditions are met, signatures will be configured into Intrusion Prevention as follows:
| Action | Function |
|---|---|
| Recommended | Each signature will use their specific Recommended Action. If that Recommended Action is disabled, it will not be enabled at all. |
| Enable Log | Each signature will be enabled to log. |
| Enable Block if Recommended is Enabled | Only if the signature's Recommended Action is Log will the signature be configured for Block. Use this for "wide" condition matches like classtype. |
| Enable Block | Each signature will be enabled to block. Use this for "narrow" matches like sid and gid. |
| Disable | Each signature will be disabled and not used by Intrusion Prevention. |
| Whitelist | Each signature's Source and/or Destination networks will be modified to exclude networks defined by the selected variables. |
Signatures
The Signature tab shows the entire database of signatures, both the defaults set provided as well as any custom signatures you may add.
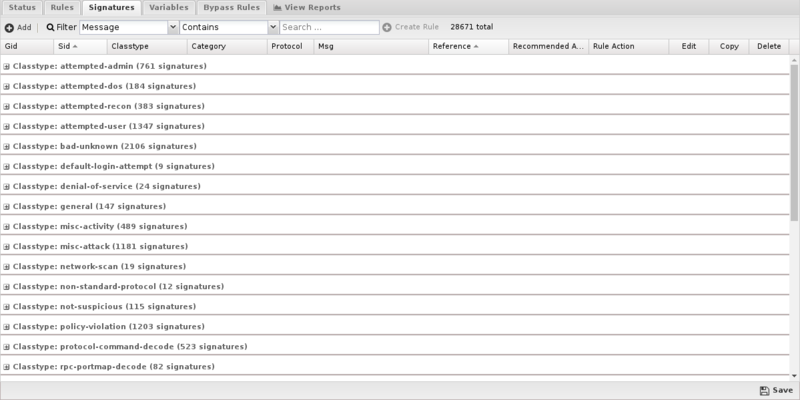
By default, signatures are grouped by classtype and you can expand the groups to view the individual signatures.
To better find specific signatures, you can use the Filter to select signature fields and the match you're looking for. The grid view will change to show those signatures matching the filter.
If your filter returned one or more matches, you can create a rule from the filter by clicking Create Rule.
Mousing over grid cell will show appropriate information related to that cell. For example, if you mouse over the Rule Action cell, you'll see which rule is affecting this signature.
Custom Signatures
You may create and maintain your own signatures, but most use the default database.
If you wish to add custom signatures you can do so either by clicking Add.
Alternatively, if you wish to create a new custom signature on an existing signature, you can click Copy then edit that copy.
NOTE: Don't be tempted to copy a signature to change its Recommended Action. Create a Rule instead!
Variables
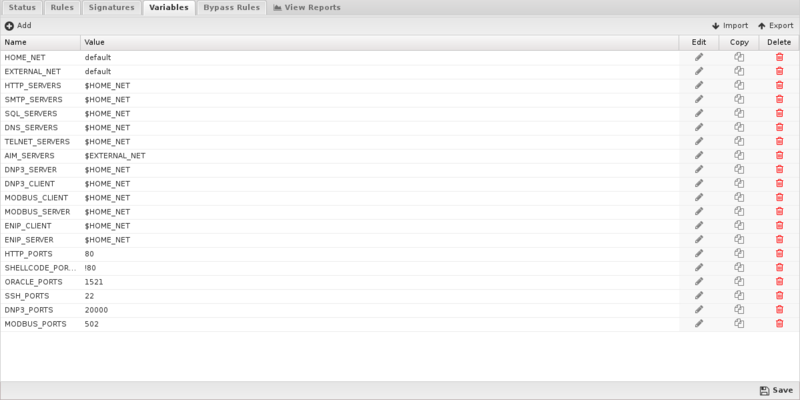
This tab provides administrators access to Suricata variables. These variables are used in rules to specify criteria for the source and destination of a packet.
Suricata's most important variable is $HOME_NET. $HOME_NET defines the network or networks you are trying to protect - it is computer automatically based on your network configuration - it includes all local networks (including aliases). Under nearly every circumstance you will want to leave these values as-is.
Using the Add button, custom variables can be added. Adding variables may be used by users adding their own rules.This should only be attempted by advanced users with a strong knowledge of Suricata signature creation.
Bypass Rules
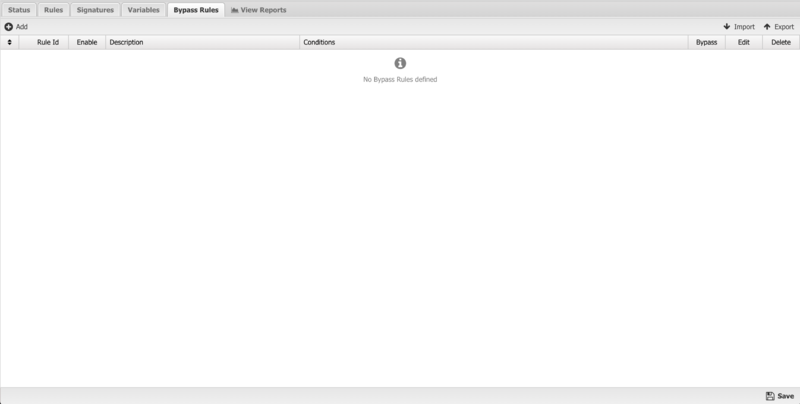
Bypass rules enable you to configure traffic that should not be scanned by Intrusion Prevention. The Rules documentation describes how rules generally work and how they are configured.
Updates
The signature database is checked automatically every night. Updates are typically released 2-3 times week.
The signature database does not affect custom signatures.
New signatures will be integrated into Intrusion Prevention according to defined rules.
Reports
The Reports tab provides a view of all reports and events for all traffic handled by Intrusion Prevention.
Reports
This applications reports can be accessed via the Reports tab at the top or the Reports tab within the settings. All pre-defined reports will be listed along with any custom reports that have been created.
Reports can be searched and further defined using the time selectors and the Conditions window at the bottom of the page. The data used in the report can be obtained on the Current Data window on the right.
Pre-defined report queries: {{#section:All_Reports|'Intrusion Prevention'}}
The tables queried to render these reports:
All Events
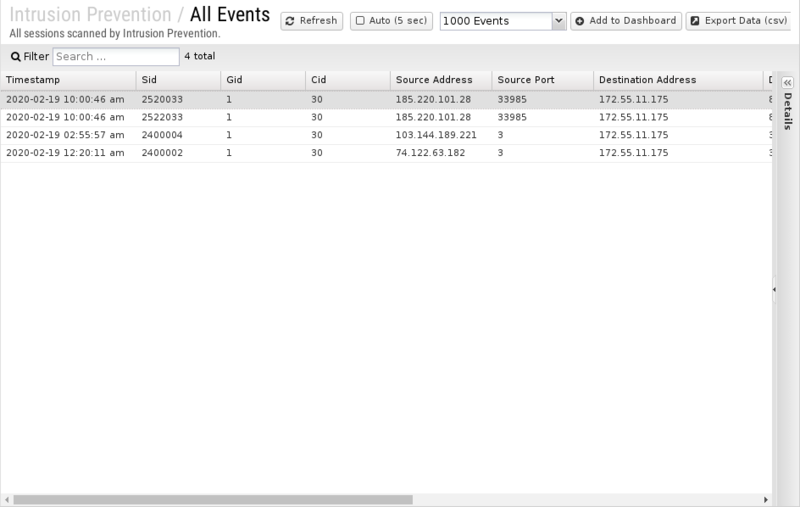
The All Events report shows all enabled signature matches found by Intrusion Prevention.
If there are signatures that are currently set to an action of Log and you determine the signature should in fact be Block, you can click the Block button on the far right. The Block button is disabled for any signature that is already blocked.
Related Topics
Suricata - Writing Suricata Signatures
Intrusion Prevention FAQs
Is Intrusion Prevention based on an open source project?
Yes, Intrusion Prevention is based on Suricata.
Why is there no reference information for a specific signature?
If there is no information link available for a specific signautre, you can try searching the signature ID at Suricata Rules for more info.
Why aren't most of Intrusion Prevention's signatures blocked by default?
Because many signatures can block legitimate traffic in addition to malicious exploits we don't enable blocking by default.
You're free to change the action of any rule to block signatures as you see fit for your network.
Can Intrusion Prevention rules be configured differently within different policies?
No. Intrusion Prevention applies to all traffic flowing through NG Firewall so different configurations are not possible.
What is the difference between rule block actions?
Enable Block if Recommended is Log will only enable a signature to Block if its Recommended Action is Log.
Enable Block will unconditionally set all matching signatures to Block.
The difference is that a signature's Recommended Action (almost always either Log or Disabled) is carefully considered by the signature provider. A rule set to Enable Block if Recommended is Log will likely set that smaller and "safer" set of signatures to Block whereas Enable Block will likely set a larger set of signatures with more potential to disrupt legitimate traffic on your network.
How can I exclude network processing for signatures?
Create a variable with the network you wish to exclude in standard CIDR format such as 192.168.1.0/24. If you have multiple networks to exclude, create a comma-separated list surrounded by square brackets such as [192.168.25.1.0/24,10.10.0.0/24].
Next, create a rule to match the signatures you wish to exclude. For Action select Whitelist and then specify the variable you created to either Source or Destination networks.
NOTE: Unlike other Rule actions, the Whitelist action doesn't enable logging/blocking for rules. Signatures affected by Whitelist rules will still be processed by the first matching non-Whitelist Rule.
How do I extend the HOME_NET variable?
IPS attempts to determine the appropriate HOME_NET based on your network configuration but if a network doesn't appear to be in the list (mouse over the variable), you can either replace the HOME_NET variable value entirely or append to the existing using by leaving the default value and adding a comma separated list of additional CIDR formatted networks such as default,10.10.10.10/32,192.168.2.0/24.
