Directory Connector
 Directory Connector Directory Connector
|
|
About Directory Connector
Directory Connector provides functionality to integrate with Microsoft's Active Directory or servers that support RADIUS, as well as some tools manager the Host Viewer username mapping for the hosts on the network.
Directory Connector provides many tools to assist with User Management.
Settings
This section reviews the different settings and configuration options available for Directory Connector.
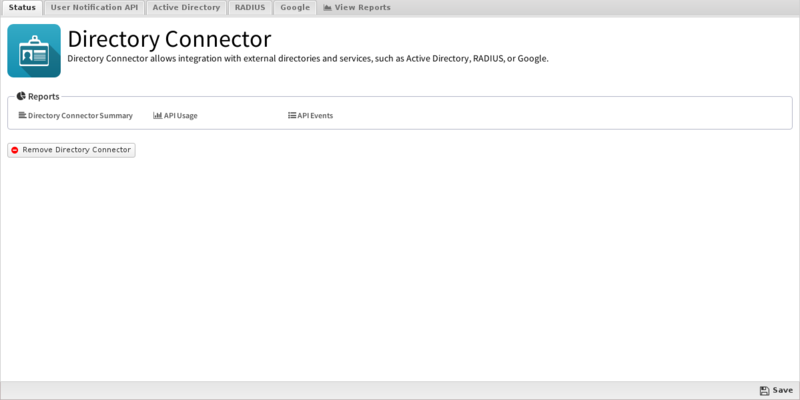
Status
This displays the current status and some statistics.
User Notification API
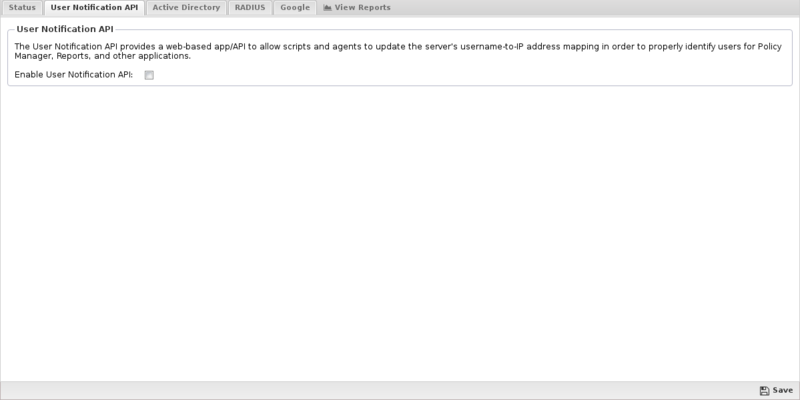
The "User Notification API" is a webapp running on the NGFW that various external scripts can call to notify Untangle that a specific user is logged into a specific IP. The userapi webapp is used to update and maintain the associated usernames in the Host Viewer so that User Matcher in Rules match correctly. When a username is associated with the Username in rules conditions matches as expected.
This API can be called:
- manually
- via the User Notification Login Script
- via the Active Directory Server Login Monitor Agent
- via any custom script or external program
- Enable/Disable If enabled the User Notification API is enabled. If disabled, the User Notification is completely disabled.
- Secret Key: If specified, only API calls specifying the correct secret key will be allowed. All other requests are ignored. If not specified, it is not required to use the API however the clientIP argument is ignored to avoid API abuse.
The webapp lives at http://SERVERIP/userapi/registration on the server and can be called with the following arguments:
| Argument | Example | Description |
|---|---|---|
| clientIp | 192.168.1.100 | The client IP address of the host in question |
| username | foobar | The username to associate with the client IP. |
| hostname | machinename | The hostname to associate with the client IP. This argument is optional. |
| action | login or logout | The action, login is assumed if no action is specified. login with associate the username and hostname of the specified client IP. logout will unset the client IP's associated username. |
| secretKey | foobarsecret | If this argument does not match the specified secretKey the call will be ignored. |
For example, If the NGFW internal IP is 192.168.1.1 without a secretKey, to associate user "foobar" on machine "foobarpc" to 192.168.1.100 you would call visit this URL:
To unset that username mapping when the client logs out simply visit this URL:
http://192.168.1.1/userapi/registration?action=logout&clientIP=192.168.1.100&secretKey=foobarsecret
Obviously visiting these URLs manually each time a user logs in or out of a machine is not realistic. Typically this process is automated in one of two ways described below or using a custom script.
User Notification Login Script
The User Notification Login Script or UNLS which is a small script that runs at login on each machine to notify the NGFW when a user logs in. This script can be pushed out to all the machines in a domain via a group policy object. This is useful in cases where you want to set the username in the Host Viewer without having users manually log into the Captive Portal.
Once installed, the script starts each time a user logs on to the network and immediately notifies Untangle of the username and IP address. Once this process is finished, any activity for that IP address will be automatically mapped to the username. This scripts runs on login and periodically in the background to keep the Directory Connector Username Map updated with any current information on your network users.
To download the User Notification Login Script, click on the Download User Notification Login Script button and download the script. The script will be configured for your environment but may require further customization. Review the script and make changes as needed.
Now that you have the UNLS on your Domain Controller, you need to decide if you want it run for all domain users or only for specific users.
UNLS for the entire domain
To apply UNLS to the your entire domain you'll need to set up a new Group Policy Object - please follow the instructions below.
- Click on the Download User Notification Login Script and save the user_notification.vbs file to \\localhost\\NETLOGON.
- Log on to the Domain Controller, then launch the Group Policy Management Console (Start > Run: gpmc.msc).
- From the Group Policy Management Console, right-click on the domain and select Create and Link a GPO here.
- Specify a name for the Group Policy.
- Right-click on the group policy that you just created and click Edit.
- Go to User Configuration > Windows Settings > Scripts (Logon/Logoff).
- Click on the Logon icon, then Show Files. Windows Explorer will launch into the correct directory.
- Copy the user_notification.vbs file that you downloaded to this location.
- Click the Add button, browse for the script, then click OK.
- In the Logon Properties window, click Add , type a descriptive script name, then click ok.
- In the Select User, Computer or Group window, select the OU or Group to which you want to apply this GPO.
- From a command prompt, activate the group policy that you just created: gpupdate /force.
You can verify it is working by looking in the Event Log for login/logout events.
UNLS for specific users
If you only want to use the UNLS for a few users, you can use these instructions:
- Click on the Download User Notification Login Script and save the user_notification.vbs file to \\localhost\\NETLOGON.
- Using a text editor, create a local.bat file that has the following lines:
@ echo off
\\ADServerIPAddress\netlogon\user_notification.vbs
- Save the local.bat file to \\localhost\\NETLOGON.
- From the domain, go to the Users folder, right-click the user and go to Properties.
- On the Profile tab, type the filename of the UNLS (probably user_notification.vbs) in the Logon script field.
- Launch the Group Policy Management Console, then launch the Group Policy Object Editor (Start > Run: gpedit.msc).
- Copy the user_notification.vbs file that you downloaded in the first step to this location.
Active Directory Server Login Monitor Agent
The other way to call the User Notification API is by running an agent/monitor on the Active Directory Server. The agent monitors the server's login events and updates the Untangle NGFW when a user logs to a computer. This has several advantages over the UNLS.
NOTE - To use the Active Directory Login Monitor a Secret Key must be specified.
- It allows you to set a secretKey that only the agent knows, so only the AD server itself can update the username mapping. (users have no way of overriding changing the information)
- It is not necessary to run a login/logout script on all machines. No GPO is necessary.
First download and install the agent on the Active Directory server. and configure it so that it updates the Untangle NGFW server when it sees user login events.
Configure the NGFW Settings in Login Monitor so it updates your Untangle NGFW event when login events occur.
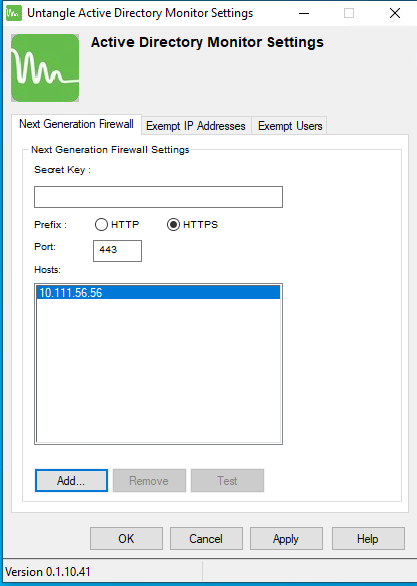
- Secret Key: The Secret Key if there is a Secret Key configured on the NGFW #User_Notification_API. User Notification must be enabled on the NGFW. If no Secret Key is configured leave it blank.
- Prefix: The protocol to use to communicate with the NGFW Untangle Server.
- Port: The port to use to communicate with the NGFW Untangle Server The default is port 80 for HTTP and 443 for HTTPS.
- IP Addresses: The IP addresses to reach your NGFW Untangle Servers. Generally this should be the LAN addresses of your NGFW Untangle Servers. By default HTTP and HTTPS is closed on the WAN side of NGFW Untangle Server. If the Login Monitor Agent cannot reach the NGFW, an error icon is shown next to the NGFW IP address entry.

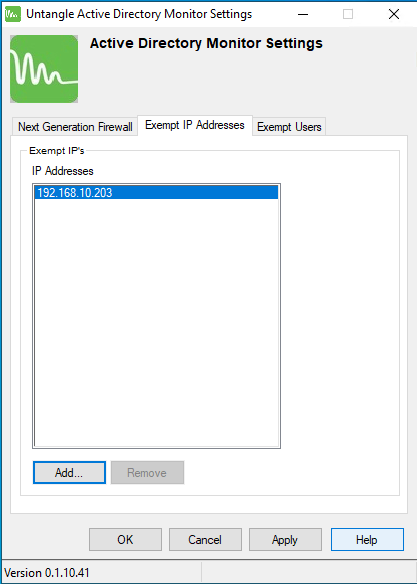
The Exempt IP Addresses tab is a list of IP addresses which Login Monitor should ignore for login events. IP addresses are accepted in the following format:
- Single IP address (192.168.2.2)
- Wildcard IP address (192.168.3.*)
- CIDR (192.168.4.0/24)
- Range (192.168.5.5-192.168.5.102)
The Exempt Users tab is a list of AD users which Login show ignore for login events.
Active Directory
The Active Directory Connector allows Untangle to communicate with the Active Directory server. This is useful for two things:
- Allowing users to login to Captive Portal using their AD login/password. The Captive Portal will verify the authentication information directly with the AD server.
- Allow Untangle to query the groups so the it knows which groups a user belongs to. If this is configured the User in Group matcher in Rules will correctly match.
Before configuring the Active Directory Connector here are a few important steps:
- Ensure that your Active Directory users are in one domain. Users can be in multiple Active Directory Organizational Units (OUs), but must be under one domain - multiple domains are not supported at this time.
- Check to see if you have the Group Policy Management Console installed; if not, install it.
- If you're running Active Directory on Windows Server 2008, please see this FAQ entry on disabling the Signed LDAP requirement if you have installed with the strictest security settings.
The Active Directory Connector tab contains settings for connecting and communicating with a Domain Controller. Other applications such as Captive Portal can use Directory Connector to authenticate and identify users against an existing Domain Controller.
- AD Server IP or Hostname: The IP or hostname of the AD server - we recommend using the IP to prevent DNS issues.
- Secure: Enable SSL for the connection to the AD server.
- Port: The port to use when connecting to the AD server. The default is 389.
- Authentication Login: Enter an Active Directory Administrator login.
- Authentication Password: Enter an Active Directory Administrator password.
- Active Directory Domain: Your domain, (e.g. mycompany.local).
- Active Directory Organization: The Active Directory organization unit (OU) that contains the users. If you want the Untangle Server to find all users, leave this blank.
- If for some reason you want to limit the users to a specific part of the domain tree, specify the OU path in the format of OU=ouName. Only one OU can be entered.
You can use the test tools to verify your settings and view an incomplete user list. After Active Directory is configured, you can configure Captive Portal to use it for authenticating users if you wish.

RADIUS
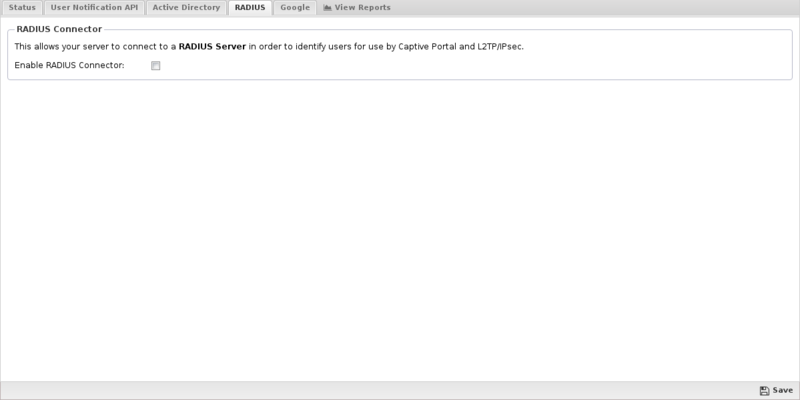
The RADIUS Connector allows Untangle to communicate with a RADIUS server. This is useful for:
- Allowing users to login to Captive Portal using their RADIUS login/password. The Captive Portal will verify the authentication information directly with the AD server.
The RADIUS tab contains settings to configure communication with the RADIUS server.
- RADIUS Server IP or Hostname: The IP or hostname of the RADIUS server - we recommend using the IP to prevent DNS issues.
- Port: The port to use when connecting to the RADIUS server. The default is 1812.
- Shared Secret: This must match the shared secret set on the RADIUS server.
- Authentication Method: This must match the authentication method used by the RADIUS server.
You can use the test tool to verify your settings. After RADIUS is configured, you can configure Captive Portal to use it for authenticating users if you wish.
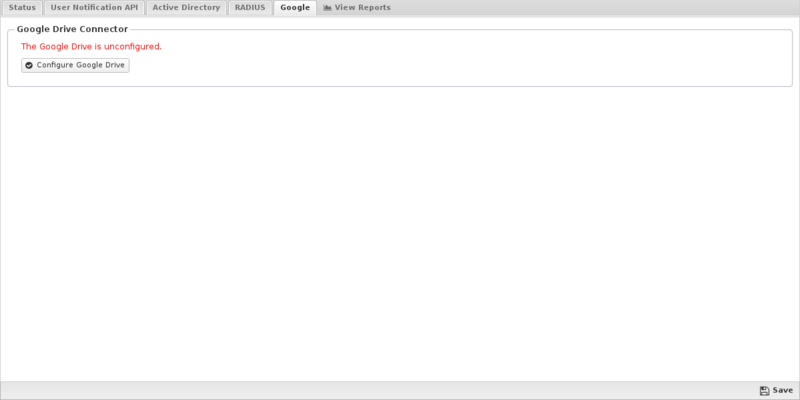
The Google Connector allows Untangle to communicate and link with your Google account, specifically to upload data to your Google Drive.
To enable Untangle to connect to Google Drive, click the Configure Google Drive button. It will open a window to google where you have to grant Untangle permission to connect to your google drive account.
If you click Allow Untangle will be able to access the Google Drive API for your account.
Allow Untangle to connect to Google Drive enables Reports to upload reporting CSVs and reporting data to Google Drive, and enables Configuration Backup to backup to Google Drive. To configure that functionality edit the settings of the respective app.
The Google Connector also allows Untangle to authenticate against google accounts. This is experimental and is not suggested for deployments.
The Facebook Connector allows Untangle to authenticate against facebook. This is experimental and is not suggested for deployments.

Reports
The Reports tab provides a view of all reports and events for all sessions handled by Directory Connector.
Reports
This applications reports can be accessed via the Reports tab at the top or the Reports tab within the settings. All pre-defined reports will be listed along with any custom reports that have been created.
Reports can be searched and further defined using the time selectors and the Conditions window at the bottom of the page. The data used in the report can be obtained on the Current Data window on the right.
Pre-defined report queries: {{#section:All_Reports|'Directory Connector'}}
The tables queried to render these reports:
Related Topics
Directory Connector FAQs
The UNLS never completes or isn't working. Why?
You'll need to make sure Domain Controller has the following settings:
ComputerConf > Policies > Admin Templates > System > Scripts
- Run logon scripts synchronously =  disabled
- Run startup scripts asynchronously = enabled

UserConf > Policies > Admin Templates > System > Scripts
- Run logon scripts synchronously = disabled
One user solved his issue by adding the script here:
UserConf > Policies > Administrative Templates > System > Logon > Run These Programs at System Logon
The Directory Connector works by mapping IP addresses to usernames; any IP address sharing will mean the Directory Connector will not be able to tell theses users apart. After some testing, we've seen that a product called Virtual IP when paired with Captive Portal allows these users to be differentiated and become subject to policies and filtering. This has not been tested with the login script - we'll update this entry when we have more information. Virtual IP is only available as a part of the Thinomenon Access Suite.
There is one other way to accomplish this if you are running Windows Server 2008 r2:
- On the RD Session Host server, open Remote Desktop Session Host Configuration. To open Remote Desktop Session Host Configuration, click Start, point to Administrative Tools, point to Remote Desktop Services, and then click Remote Desktop Session Host Configuration.
- In the Edit settings area, under RD IP Virtualization, double-click IP Virtualization.
- In the Properties dialog box, click the RD IP Virtualization tab.
- To enable Remote Desktop IP Virtualization, select the Enable IP virtualization check box to enable Remote Desktop IP Virtualization.
- To select the network adapter to be used for Remote Desktop IP Virtualization, in the Select the network adapter to be used for IP virtualization list, select the appropriate network adapter.
- To select the Remote Desktop IP Virtualization mode, under IP virtualization mode: Click Per session to configure Remote Desktop IP Virtualization to run in per session mode.
- If you have more than one Ethernet adapter on the server you may need to change between them back in step 5. I rebooted the server after the first tests failed but it ended up needing the other adapter.
Why can I only see 1000 users?
NG Firewall can read more than 1000 users from Active Directory, however your AD server must be configured to send more than 1000 users. Run these commands from the command prompt on the AD server to send up to 5000 users:
ntdsutil.exe
LDAP policies
Connections
Connect to server addomainname.local
Quit
Set MaxPageSize to 5000
Commit Changes
Quit
Quit
The Active Directory Login Script is still not working - what can I do?
One way to check to see if your logon script is working or not is to check the status page to view the current Username Map. If you are seeing no entries after running the script manually, edit the script and make sure the internal IP of NG Firewall is listed. If you're in bridge mode, make sure Administrator Alerts isn't telling you your bridge is backwards.
Does the GPMC (Group Policy Management Console) work with a 64bit OS?
Not officially - please check out this link or contact Microsoft for more information.
Why are my Security Groups not showing up?
Security Groups will not be displayed when using the Active Directory Users button in the settings, but they will be displayed when selecting users in the Policy Manager. Only Security Groups will be shown, not OUs.
I'm authenticating Captive Portal users against Active Directory, but no names show up in the Username Map. Why? 💡
Captive Portal must go into the rack after Directory Connector to properly work - this refers to the order in which they are installed into the rack, not the order they appear in the rack. If you're seeing this issue, simply remove Captive Portal to the rack, then add it back into the rack and reconfigure it. The next time a user logs in through it, they should correctly populate on the Username Map.
Can I use the UNLS with my OSX machines?
While NG Firewall does not directly support this, one of our users has adapted some existing scrips to provide the same functionality. You can find more information on our forums here.
Is this supported with all versions of Active Directory?
For clients running the UNLS, any version of Windows XP or newer should work. For servers, please see the table below. If you're running Windows Server 2008 and you've installed it with the strictest security settings, you must disable the signed LDAP security requirement. Microsoft has an article for enabling the feature here, however for our purposes it must be disabled. Here are the steps to disabled this setting in Windows 2008.
How to disable the server LDAP signing requirement
- Click Start, click Run, type mmc.exe, and then click OK.
- On the File menu, click Add/Remove Snap-in.
- In the Add or Remove Snap-ins dialog box, click Group Policy Management Editor, and then click Add.
- In the Select Group Policy Object dialog box, click Browse.
- In the Browse for a Group Policy Object dialog box, click Default Domain Policy under the #Domains, OUs and linked Group Policy Objects area, and then click OK.
- Click Finish.
- Click OK.
- Expand Default Domain Controller Policy, expand Computer Configuration, expand Policies, expand Windows Settings, expand Security Settings, expand Local Policies, and then click Security Options.
- Right-click Domain controller: LDAP server signing requirements, and then click Properties.
- In the Domain controller: LDAP server signing requirements Properties dialog box, enable # Define this policy setting, click to select Require signing in the Define this policy setting drop-down list, and then click OK.
- In the Confirm Setting Change dialog box, click Yes.
You should then run gpupdate /force on the server to update the current group policy.
| AD Server OS | Support |
|---|---|
| Windows Server 2012 | Yes |
| Windows Server 2012 Essentials | Yes |
| Windows Server 2008 | Yes |
| Windows Small Business Server 2008 | Yes |
| Windows Small Business Server 2003 | No |
| Windows Server 2003, Standard SP2 | No |
| Windows 2000 Server | No |
| Windows NT 4.0 Server | No |
Can I use an LDAP Server other than Active Directory? 💡
Directory Connector is designed specifically for Active Directory or a RADIUS server. It does not support alternative LDAP servers such as OpenLDAP.
What do I enter in the fields for nested OUs? 💡
For nested OUs, the nested OU 'IT' needs to be specified like this in Directory Connector: OU=IT,OU=Users,OU=MyBusiness
Note: spaces are allowed.