Intrusion Prevention3
 Intrusion Prevention Intrusion Prevention
|
|
About Intrusion Prevention
Intrusion Prevention is an Intrusion Detection system that detects malicious activity on your network. To detect malicious activity, Intrusion Prevention uses signature detection, a method that draws upon a database of known attack patterns. If Intrusion Prevention detects malicious activity, the session for that activity is terminated.
Note: Intrusion Prevention installs but is off by default. When you enable Intrusion Prevention for the first time, you will be presented with a setup wizard. It is highly recommended to complete the wizard and use the recommended configuration. Using a custom configuration and enabling too many signatures may negatively impact your network.
Note: Intrusion Prevention requires at least 2 gigabytes of RAM.
Setup Wizard
Intrusion Prevention includes a setup wizard to help optimize the The wizard is designed to help you correctly configure the appropriate amount of rules for your network by selecting rule identifiers: classtypes and categories. The more that you select, the more rules will be enabled.
Again, too many enabled rules may negatively impact your network, so it is highly suggested to use the recommended settings.
Step 1 - Classtypes
Classtypes are a generalized grouping for rules, such as attempts to gain user access or web application attacks. The recommended settings will enable all classtypes with a medium or higher threat level. It is highly suggested to use the recommended setting.
To enable low level classtypes or disable the recommended classtypes you can choose the Custom radio option. You will see a list of all classtypes and have the ability to enable or disable to meet your needs.
Step 2 - Categories
Categories are a different rule grouping that can span multiple classtypes, such as VOIP access or operating systems. The recommended setting is to enable the preprocessor_portscan which is always included. It is highly suggested to use the recommended setting.
To other categories choose the Select by name radio option. You will see a list of all categories and have the ability to enable or disable additional categories.
After Step 2 the Intrusion Prevention setup wizard is complete. Based on your selections and the amount of memory in your system, the appropriate Intrusion Prevention rules will automatically be enabled.
Note: You can always re-run the setup wizard at any time using the Run Intrusion Detection/Prevention Setup Wizard button on the Status tab. This is useful to reset back to the recommended settings if you find problems with network performance.
Settings
Status
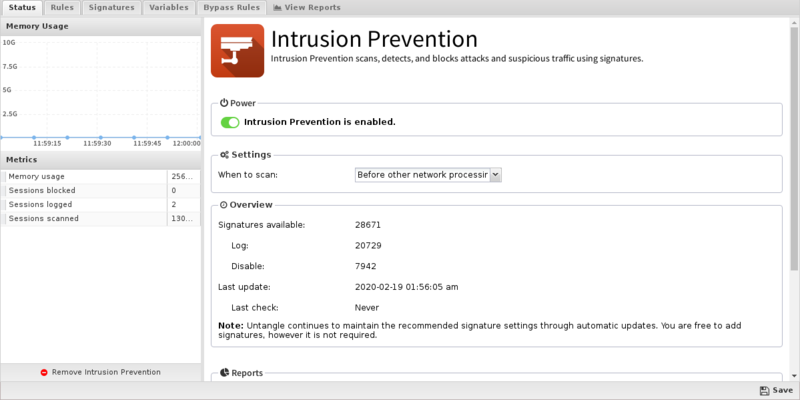
The Status tab simply shows you information about Intrusion Prevention's definitions - there is nothing to configure.
Click the Run Intrusion Detection/Prevention Setup Wizard to re-run the setup wizard.

Rules
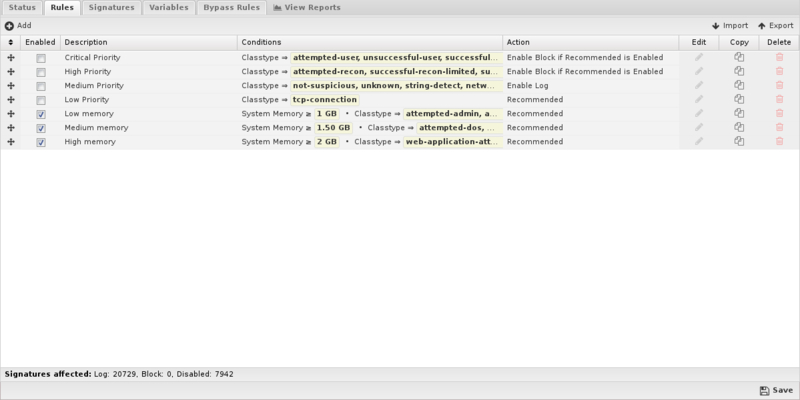
Intrusion Prevention provides a list of rules (signatures) that you can have Untangle Log or Block when traffic matches them. The rules are grouped by classtype and can be searched using the search field at the bottom of the page.
In most cases, you do not need to change the default settings configured in the setup wizard. You should only need to disable a rule if that rule blocks traffic from a unique software application that you must use. Simply uncheck Block (and Log if you wish) and the the traffic will no longer be blocked.
The rules are automatically updated using the latest Snort signatures.
- SID: The signature ID of the rule.
- Classtype: Snort classtype (grouping) of the rule.
- Category: Snort category (grouping) for the rule.
- Msg: Name of the signature.
- Reference: Links to reference information on the attack the signature will detect (if available).
- Log/Block: Enable these to log or block traffic matching the signature.
- Edit: Edit the rule. This is not recommended and should only be attempted by advanced users with a strong understanding of Snort rules. Invalid or poorly written rules will negatively impact network performance.
- Delete: Delete the rule from the system.
Using the Add button, you can also add your own signatures to the system. This should only be attempted by advanced users with a strong knowledge of Snort signature creation. Adding invalid or poorly written rules will negatively impact network performance.

Variables
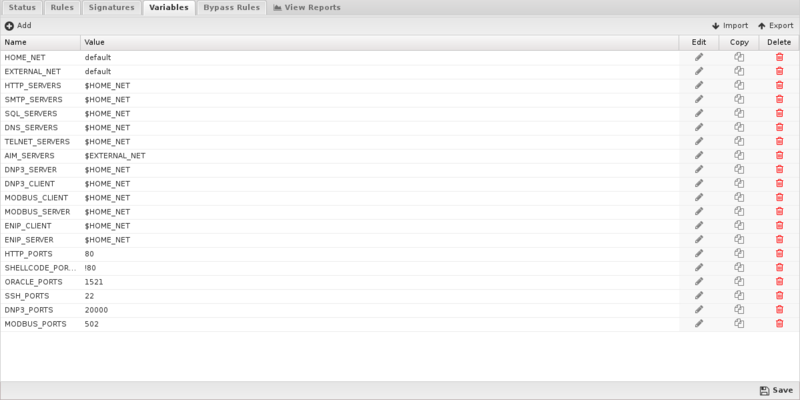
This tab provides administrators access to Snort variables. These variables are used in rules to specify criteria for the source and destination of a packet.
Snorts most important variable is $HOME_NET. $HOME_NET defines the network or networks you are trying to protect - it is computer automatically based on your network configuration - it includes all local networks (including aliases).
Using the Add button, custom variables can be added. Adding variables may be used by users adding their own rules.This should only be attempted by advanced users with a strong knowledge of Snort signature creation.

Updates
Rules are automatically updated every night. Any rule modifications the administrator has made will remain even if the rule's behavior is updated. New rules are added with the recommended Log action. Deleted rules are not removed unless they are not enabled (neither Log or Block).
Reports
The Reports tab provides a view of all reports and events for all traffic handled by Intrusion Prevention.
Reports
This applications reports can be accessed via the Reports tab at the top or the Reports tab within the settings. All pre-defined reports will be listed along with any custom reports that have been created.
Reports can be searched and further defined using the time selectors and the Conditions window at the bottom of the page. The data used in the report can be obtained on the Current Data window on the right.
Pre-defined report queries: {{#section:All_Reports|'Intrusion Prevention'}}
The tables queried to render these reports:
Related Topics
Snort - Writing Good Snort Rules
Intrusion Prevention FAQs
Is Intrusion Prevention based on an open source project?
Yes, Intrusion Prevention is based on Suricata.
Why is there no reference information for a specific signature?
If there is no information link available for a specific signautre, you can try searching the signature ID at Suricata Rules for more info.
Why aren't most of Intrusion Prevention's signatures blocked by default?
Because many signatures can block legitimate traffic in addition to malicious exploits we don't enable blocking by default.
You're free to change the action of any rule to block signatures as you see fit for your network.
Can Intrusion Prevention rules be configured differently within different policies?
No. Intrusion Prevention applies to all traffic flowing through NG Firewall so different configurations are not possible.
What is the difference between rule block actions?
Enable Block if Recommended is Log will only enable a signature to Block if its Recommended Action is Log.
Enable Block will unconditionally set all matching signatures to Block.
The difference is that a signature's Recommended Action (almost always either Log or Disabled) is carefully considered by the signature provider. A rule set to Enable Block if Recommended is Log will likely set that smaller and "safer" set of signatures to Block whereas Enable Block will likely set a larger set of signatures with more potential to disrupt legitimate traffic on your network.
How can I exclude network processing for signatures?
Create a variable with the network you wish to exclude in standard CIDR format such as 192.168.1.0/24. If you have multiple networks to exclude, create a comma-separated list surrounded by square brackets such as [192.168.25.1.0/24,10.10.0.0/24].
Next, create a rule to match the signatures you wish to exclude. For Action select Whitelist and then specify the variable you created to either Source or Destination networks.
NOTE: Unlike other Rule actions, the Whitelist action doesn't enable logging/blocking for rules. Signatures affected by Whitelist rules will still be processed by the first matching non-Whitelist Rule.
How do I extend the HOME_NET variable?
IPS attempts to determine the appropriate HOME_NET based on your network configuration but if a network doesn't appear to be in the list (mouse over the variable), you can either replace the HOME_NET variable value entirely or append to the existing using by leaving the default value and adding a comma separated list of additional CIDR formatted networks such as default,10.10.10.10/32,192.168.2.0/24.
